Step 4: Transaction labeling
Now that you’ve imported all of your transaction data and cleaned up your asset classifications, it’s time to set up labels.
Labels are an essential part of adding context to your transactions. They also play a crucial role in setting up your workspace, since about half of your chart of accounts mapping will rely on them.
This guide walks you through best practices for applying labels, along with step-by-step instructions to unlock the full potential of the labeling features.
Step 1: Manage Your Contacts
Before creating labels, we recommend setting up and organizing your contacts. This is important because label rules (automation) can be built based on movements between wallets and contacts (wallet addresses you do not own).
You can manage contacts in two places under the Business dropdown in the NAVIGATE menu:
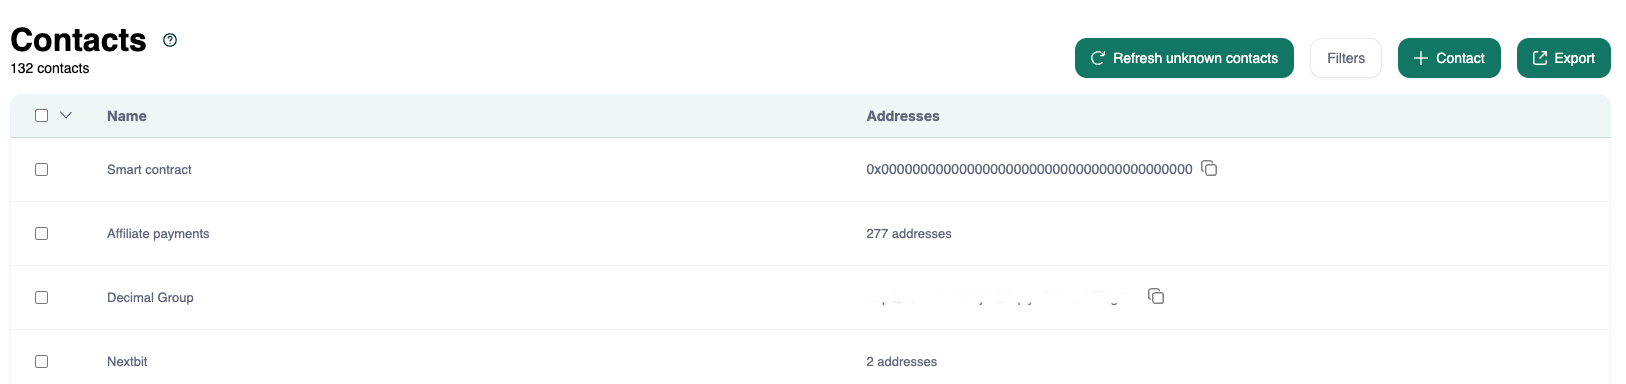
Contacts Page: Import a list of wallet addresses with contact names. Once imported, any transactions linked to these contacts will automatically update in your Transactions page.
You can assign multiple addresses to a single contact. For example, instead of naming every individual customer address, you can create one contact called “Customers” and assign all customer addresses to it.
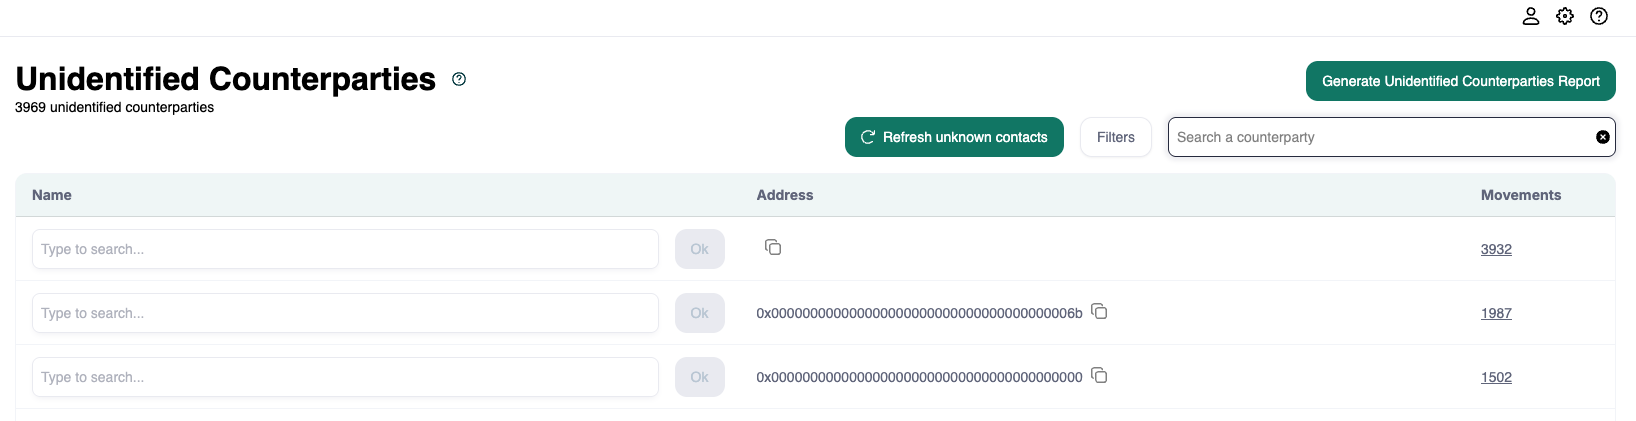
Unidentified Counterparties Page: View a list of all wallet addresses your transactions have interacted with that are not yet identified as contacts. You can add each address to an existing contact or create a new one.
You can generate a report from this page and use it as a template for importing contacts.
Once your contacts and counterparties are organized, you’re ready to create label rules.
Step 2: Optimize Labeling with Automation
At Cryptio, automation is key to scaling your workspace and reducing human error. With automation in place, you won’t need to manually relabel transactions every time you import new data or close a reporting period.
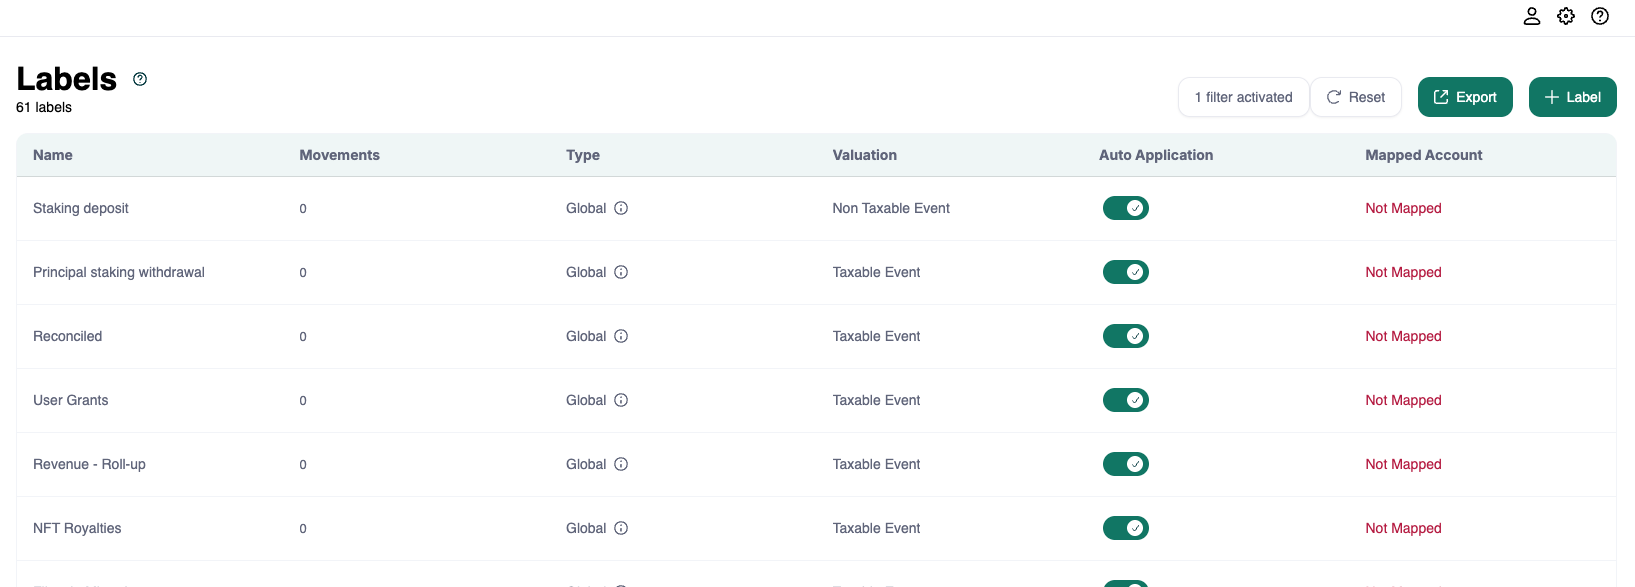
To support this, Cryptio provides Label Rules. You can find them by going to the Business dropdown under NAVIGATE, then selecting Labels. Here you’ll see some preloaded “Global Labels,” which are consistent across all workspaces. You can toggle Auto Application off if they don’t apply to you.
There are three types of label rules you can set up:
Label Rule 1: From/To
This rule applies labels based on movements between specific wallets or contacts. It’s especially useful for simple flows of funds.
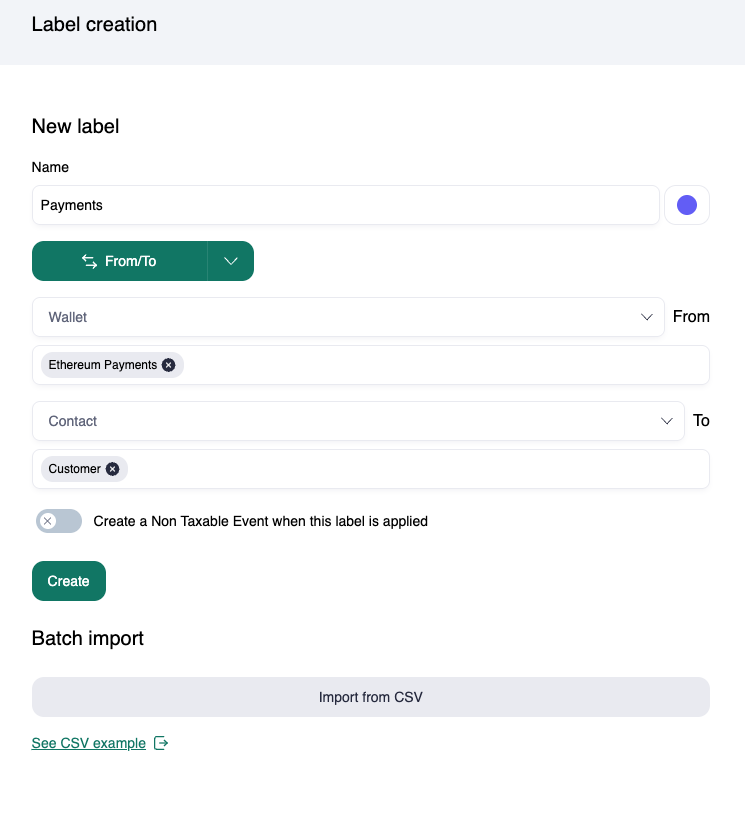
Example: If all outgoing transactions from your Ethereum Payments wallet to the Customer contact are customer payments, you can create a “Customer Payments” label rule for these movements.
To set it up:
Click + Label at the top of the Labels page.
Name your label (e.g., “Customer payments”) and optionally assign it a color for easier identification in your Transactions page.
In the From/To fields, choose wallets or contacts. You can select multiple for each field.
Click Create. Your label will appear in the list with a count of transactions it applies to and a link to view them.
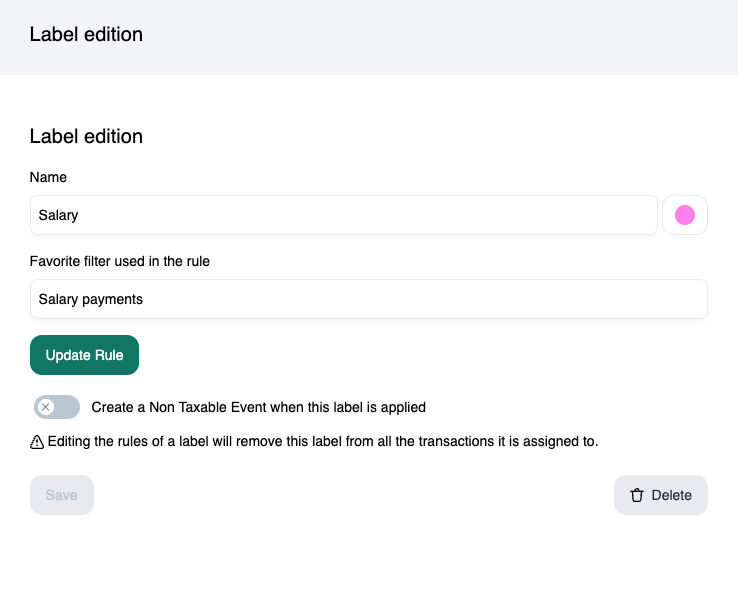
Label Rule 2: Favorite Filter
You can create Favorite Filters on the Transactions page and turn them into label rules. This allows for very granular labeling.
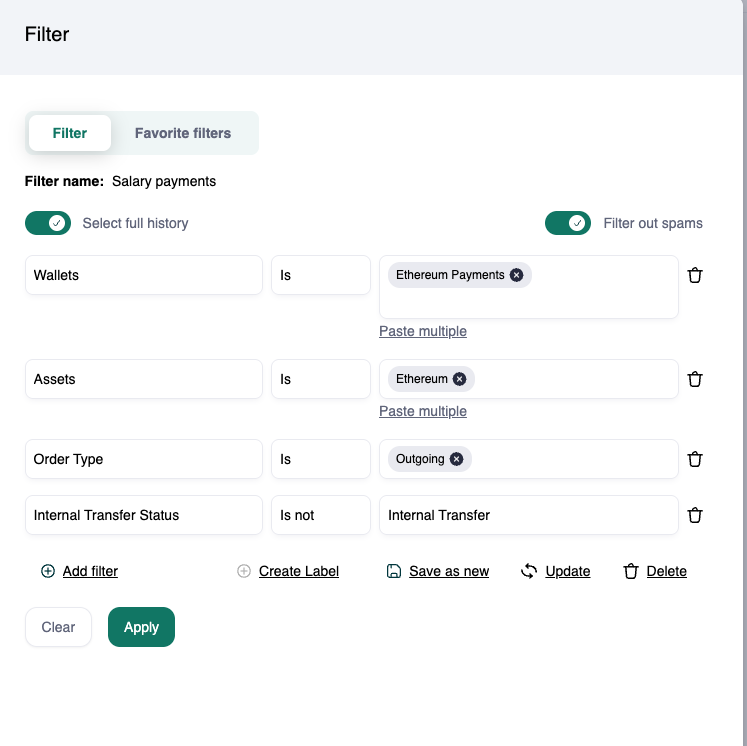
Example: To label salary payments, you can create a filter for:
Asset → Is → ETH
Wallet → Is → Ethereum Payments
Order Type → Is → Outgoing
Internal Transfer Status → Is not → Internal Transfer
Save this filter as “Salary payments.”
Then, when creating a new label, change the rule type from From/To to Favorite Filter and select the saved filter.
Click Create and the label will apply to all matching transactions.
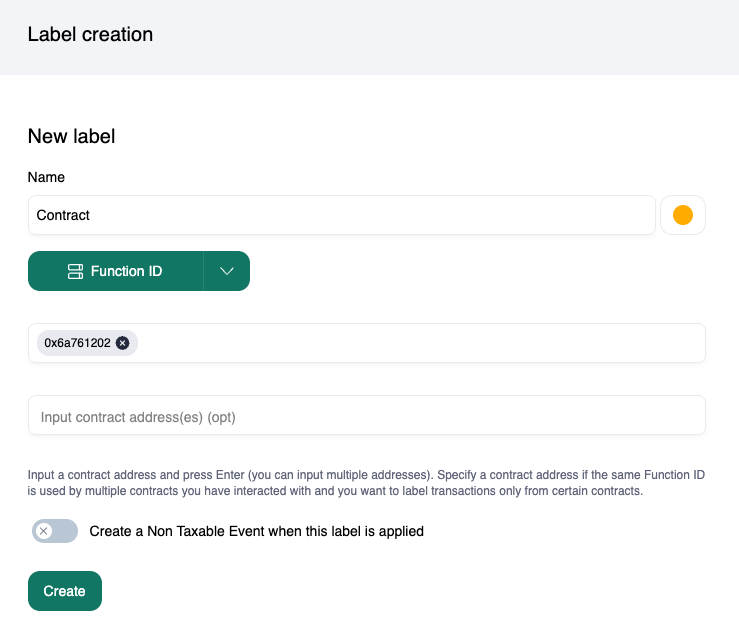
Label Rule 3: Function ID
Some labels can be built based on Function IDs, which are codes used in smart contracts to define actions.
You can view available function IDs in the Smart Contract Functions page under Business.
Example: If transactions with Function ID 0x6a761202 interact with the a specific contract, you can label them accordingly.
To set it up:
Create a new label (e.g., “Contract”).
Choose Function ID as the rule type.
Enter the Function ID and, optionally, specify contract addresses to narrow the scope.
Click Create.
The label will then be applied to all matching transactions.
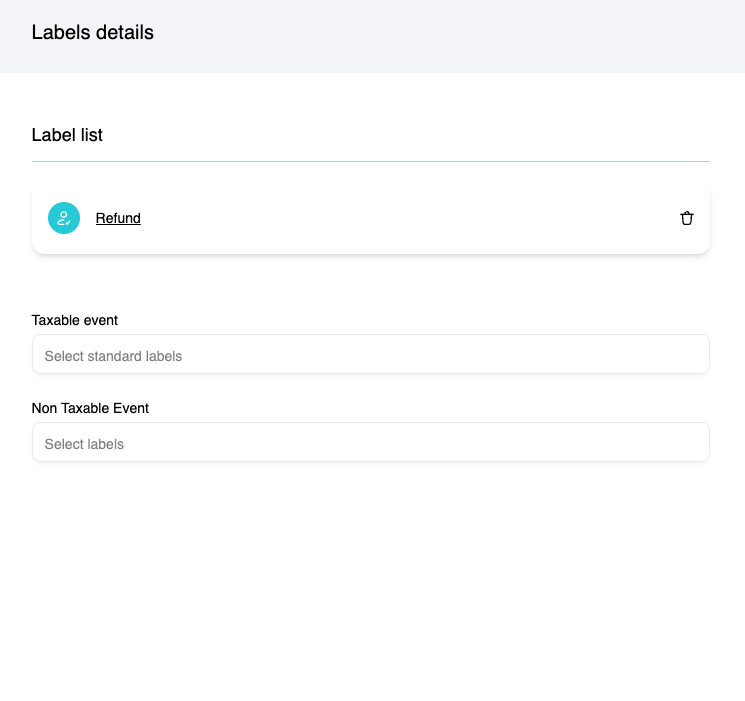
Manual Labels
You can also add labels directly from the Transactions page:
Click + Add Label in the Label column of a transaction row.
Either select an existing label or create a new one (e.g., “Refund”).
Apply it to one transaction or multiple transactions in bulk.
Check Your Progress
To review how many transactions still need labels:
Go to the Transactions page under NAVIGATE.
Click Needs Review.
Select the Transactions without labels tab.
Here, you’ll see all transactions that require labeling.
Congratulations! You’ve now imported your transactions and added meaningful context with labels. The next step is integrating with your ERP system and creating your subledger.