How to connect to Netsuite
Cryptio acts as a sub-ledger for NetSuite. This integration lets you generate automated journal entries for your crypto assets directly in traditional accounting systems.
What is NetSuite?
NetSuite is an integrated cloud business software suite that includes accounting, ERP (enterprise resource planning), CRM, and e-commerce software.
For crypto companies, NetSuite offers:
Flexibility to support evolving and innovative business models.
Cloud-based scalability so you can grow without worrying about system limitations.
Strong operational controls to manage global operations and multiple subsidiaries with ease.
How to Connect Your NetSuite Account
The setup process in NetSuite involves five key steps, followed by connecting your credentials in Cryptio.
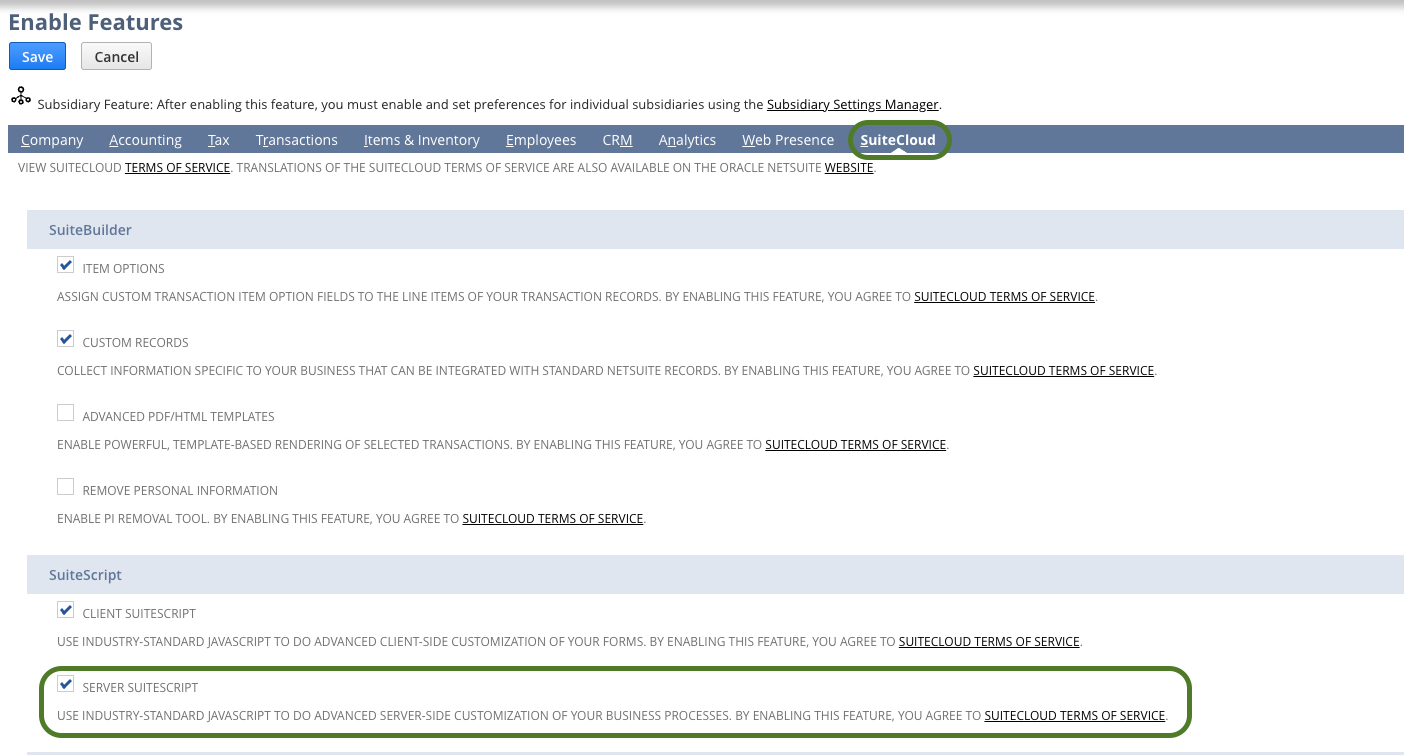
1. Enable Features (Pre-requisite)
a. In NetSuite, go to: Setup > Company > Enable Features
b. Select the SuiteCloud tab.
c. Enable:
SERVER SUITESCRIPT (under SuiteScript)
REST WEB SERVICES (under SuiteTalk)
You must agree to the Terms of Service.
d. Click Save.
2. Create a Role
a. Go to: Setup > Users/Roles > Manage Roles
b. Click New Role and name it (e.g., Cryptio Integration Role).
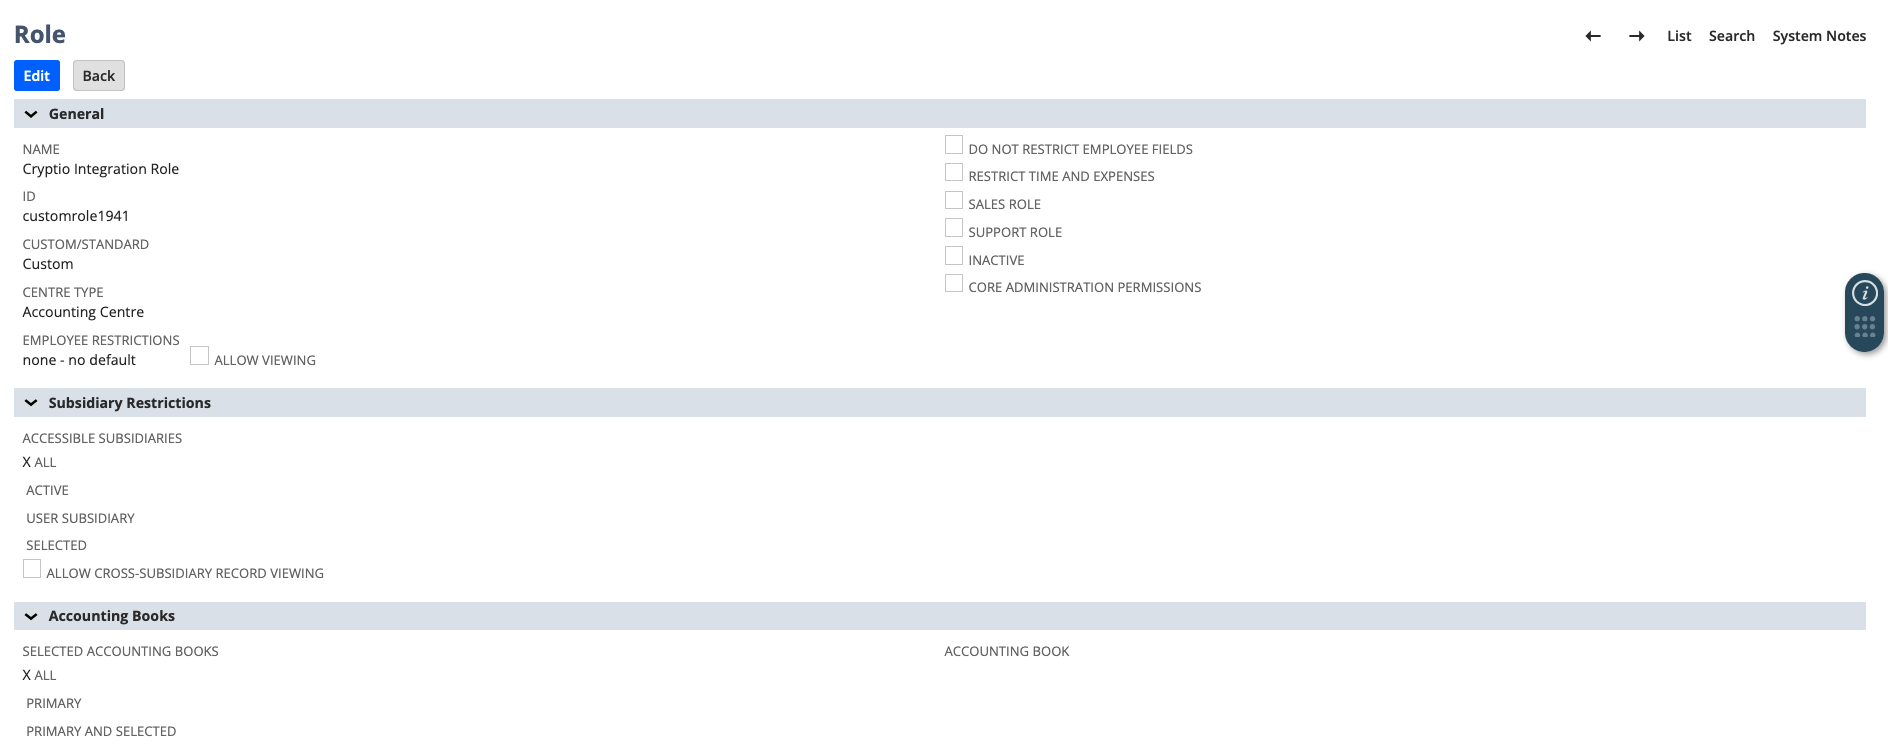
c. Under Authentication, check Web Services Only Role.

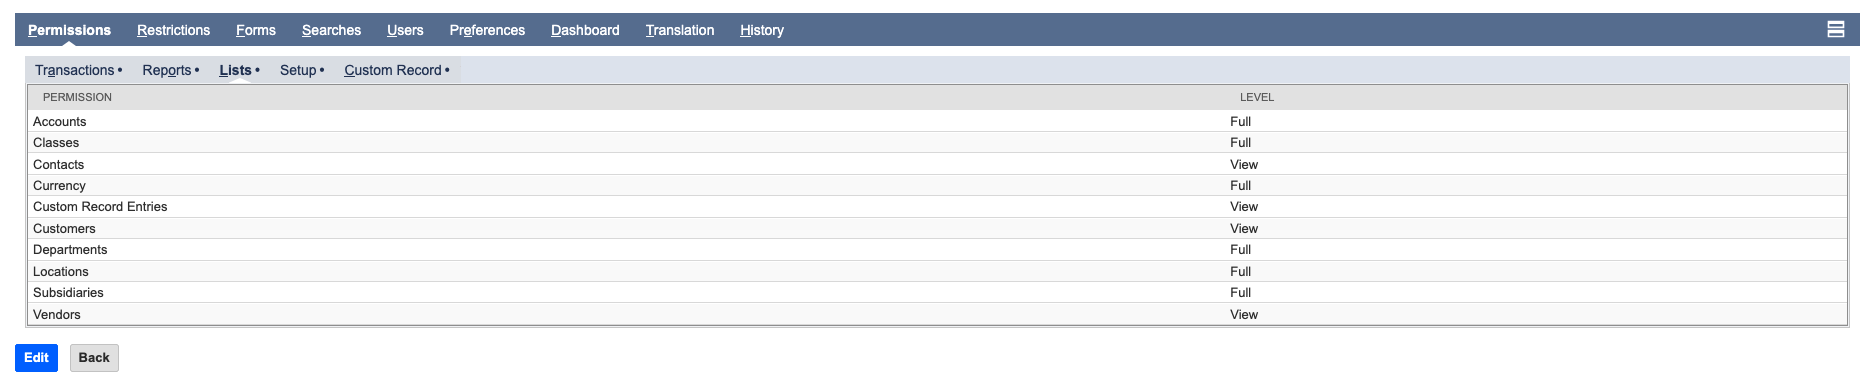
d. Assign the following permissions:
Transactions: Find Transactions (View), Make Journal Entries (Full)
Reports: SuiteAnalytics Workbook (Edit)
Lists:
Accounts (View)
Classes (View)
Currency (View)
Custom Record Entries (View)
Customers (View)
Departments (View)
Locations (View)
Subsidiaries (View)
Tax Details Tab (Full, only needed is you are using SuiteTax)
Vendors (View)
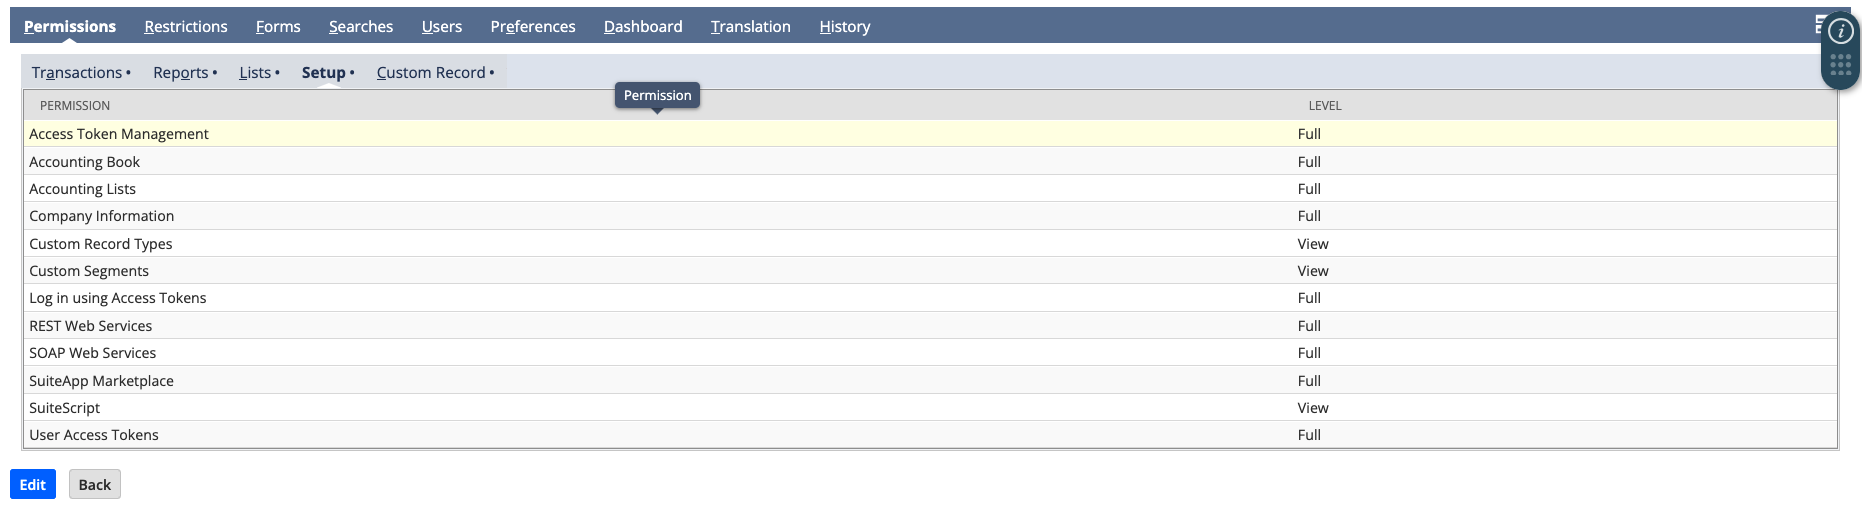
Setup:
Access Token Management (Full),
Accounting Book (Full)
Accounting Lists (Full)
Company Information (Full)
Custom Record Types (View)
Custom Segments (View)
Log In using Access Tokens (Full)
REST Web Services (Full)
SOAP Web Services (Full)
SuiteApp Marketplace (Full)
SuiteScript (View)
User Access Tokens (Full)


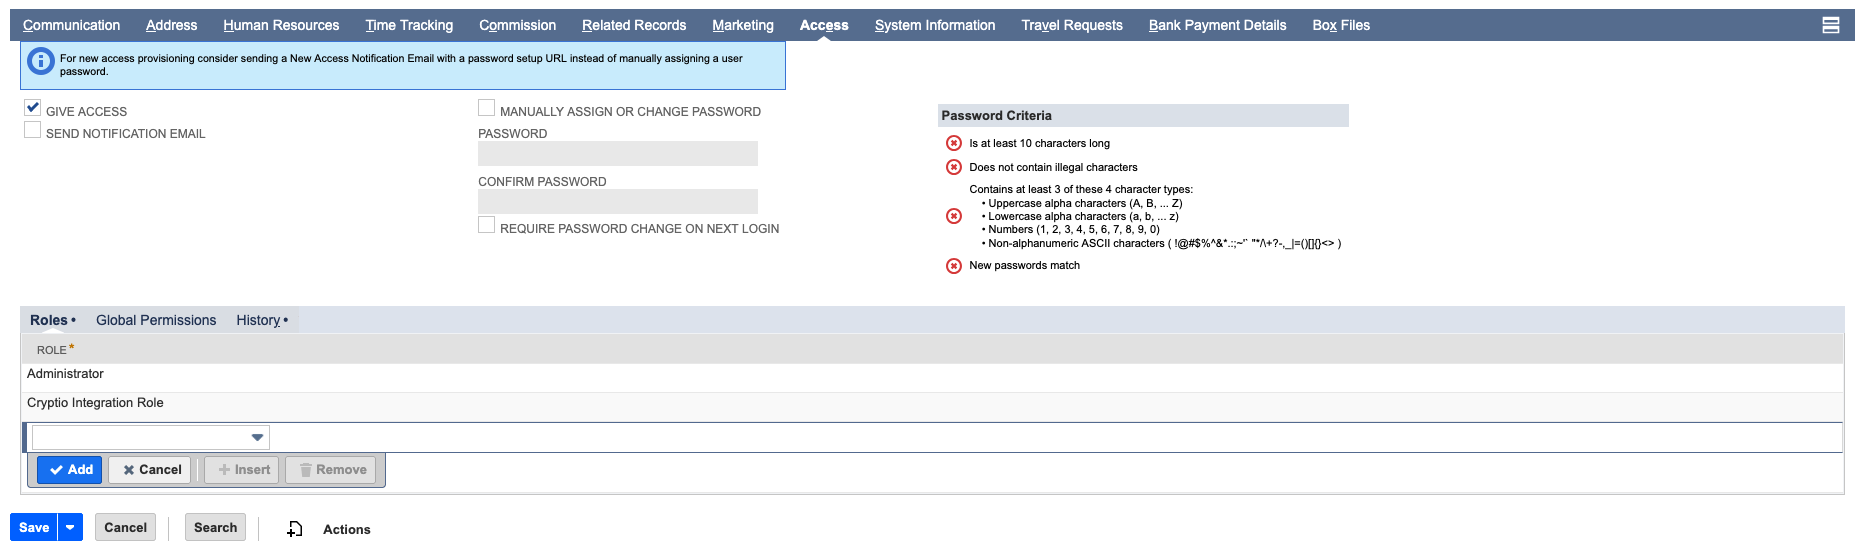
3. Link the Role to a User (Admin Only)
a. Go to: Setup > Users/Roles > Manage Users
b. Add a User to the Cryptio Integration Role in NetSuite
c. Go to Lists → Employees → Employees
d. Select the employee you want to assign the role to.
e. Click Edit on the employee record.
f. Scroll down to the Access section.
g. In the Roles list, add/select Cryptio Integration Role.
h. Click Save to apply the changes.
After saving, the employee will have access through the Cryptio Integration Role.
4. Create an Integration
a. Go to: Setup > Integrations > Manage Integrations
b. Click New and name it (e.g., Cryptio Integration).
c. Select the following options:
✅ Token-Based Authentication
✅ TBA: IssueToken Endpoint
❌ TBA: Authorization Flow
❌ OAuth 2.0 Authorization Code Grant
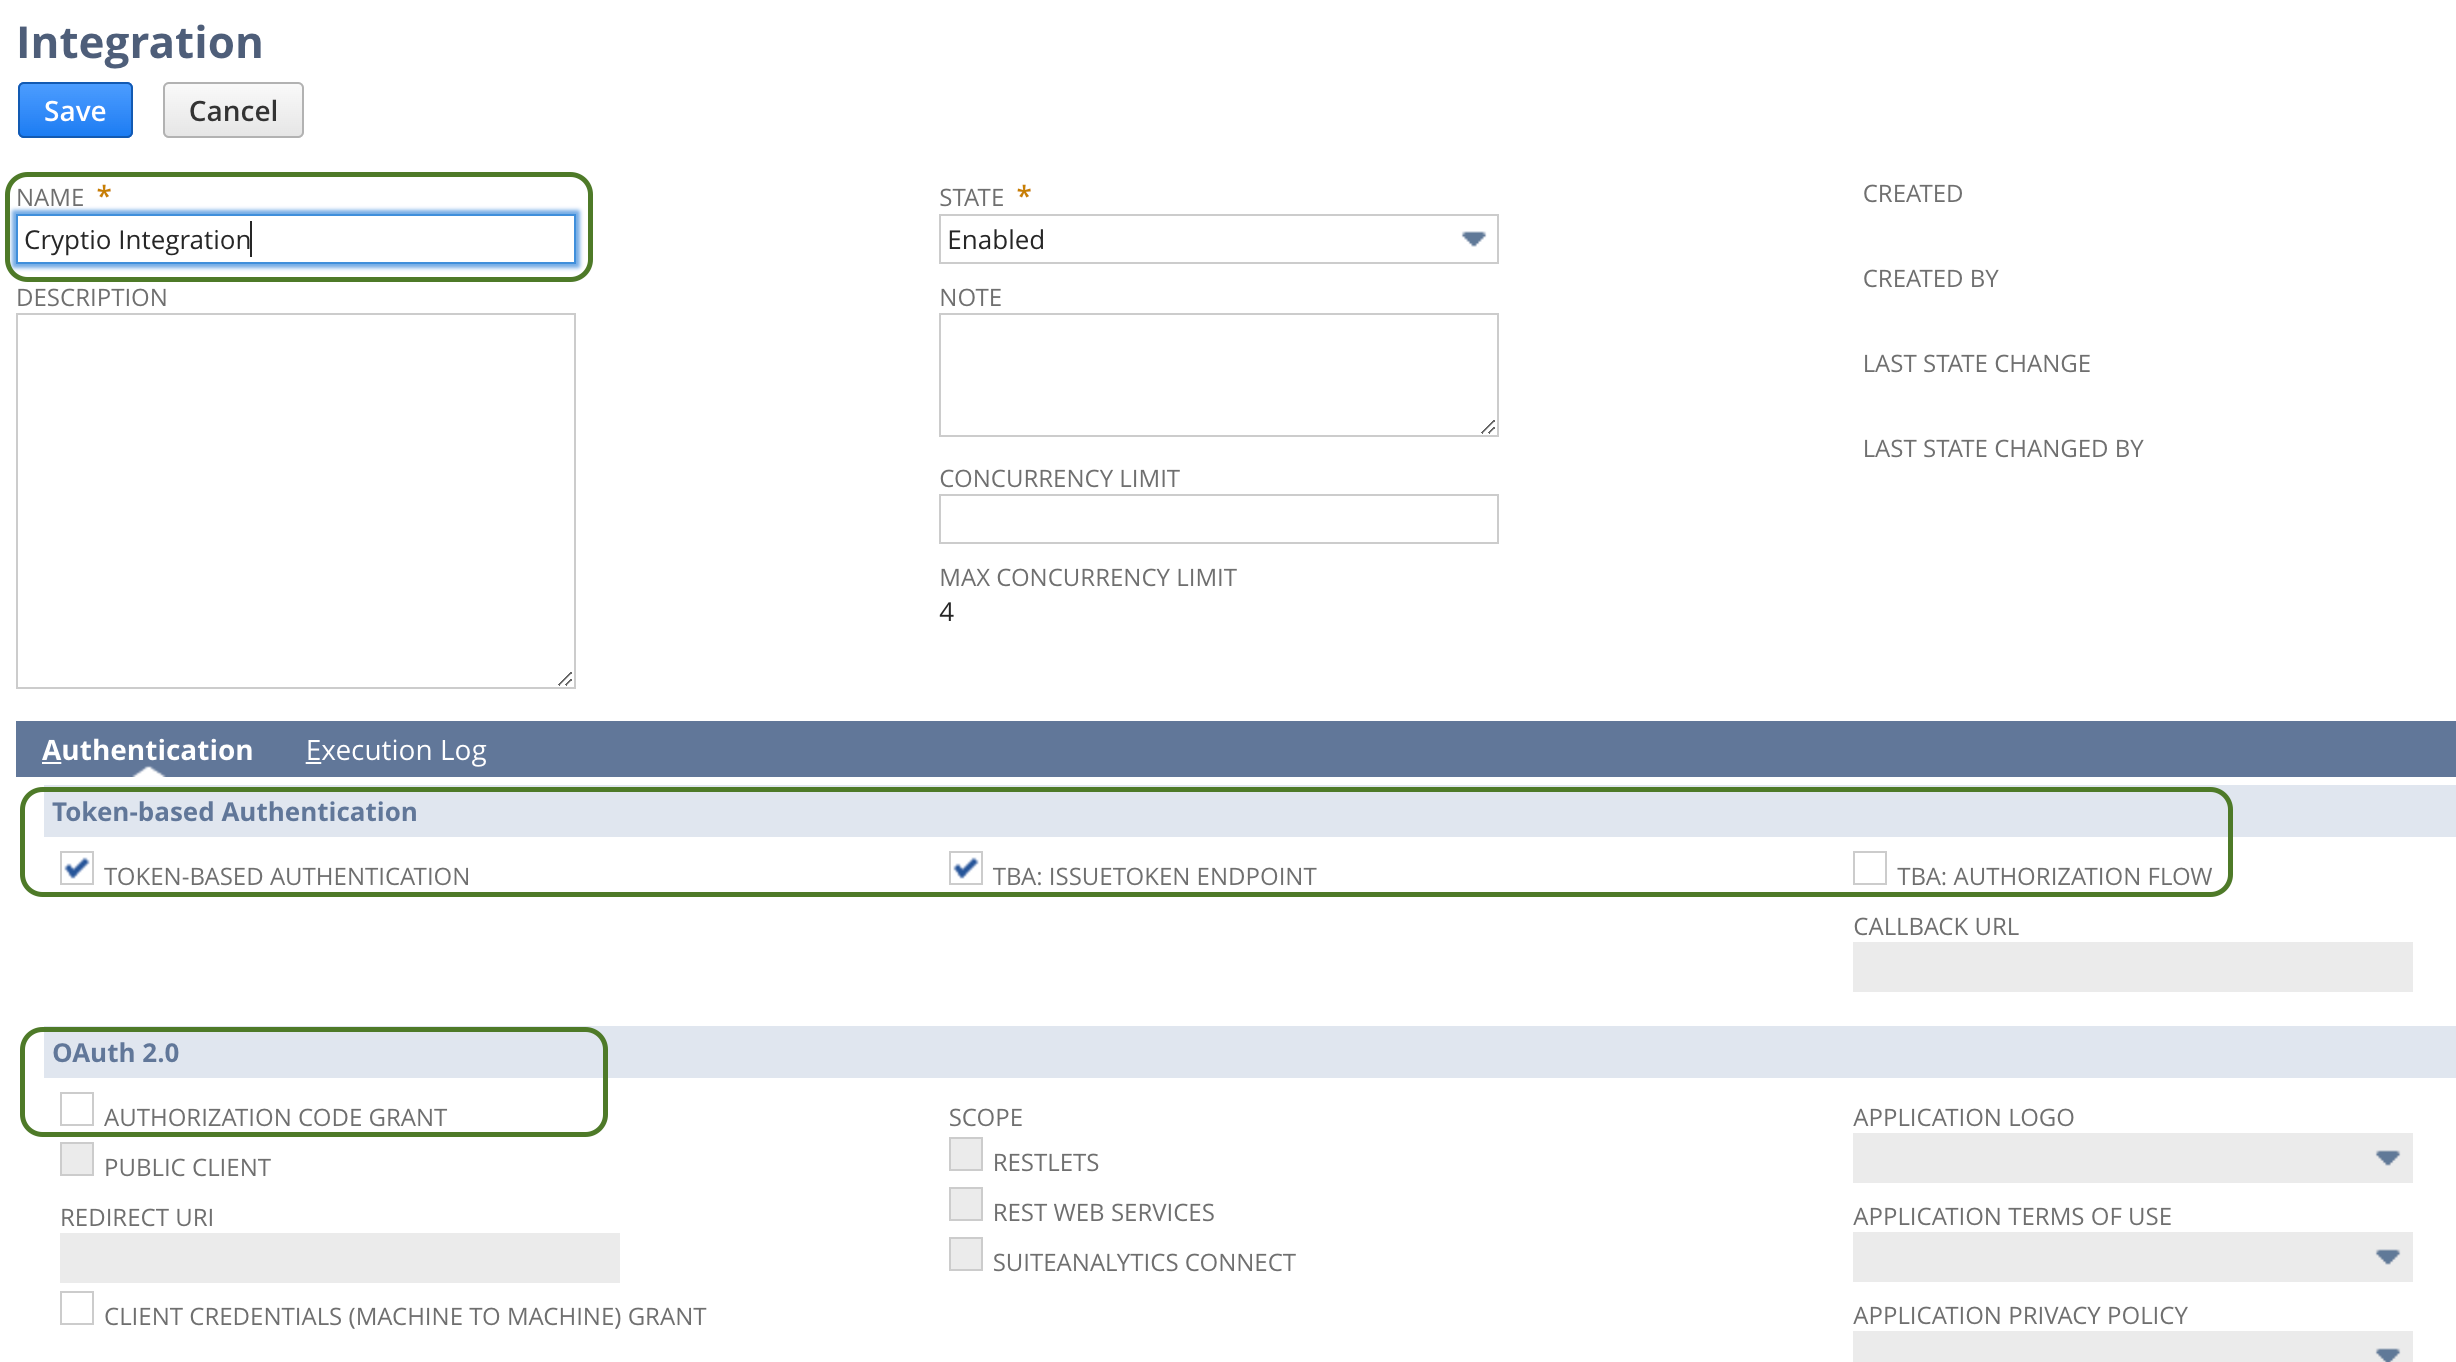
d. Click Save.
e. On the next page, copy and save the Consumer Key and Secret.
These will not be displayed again.

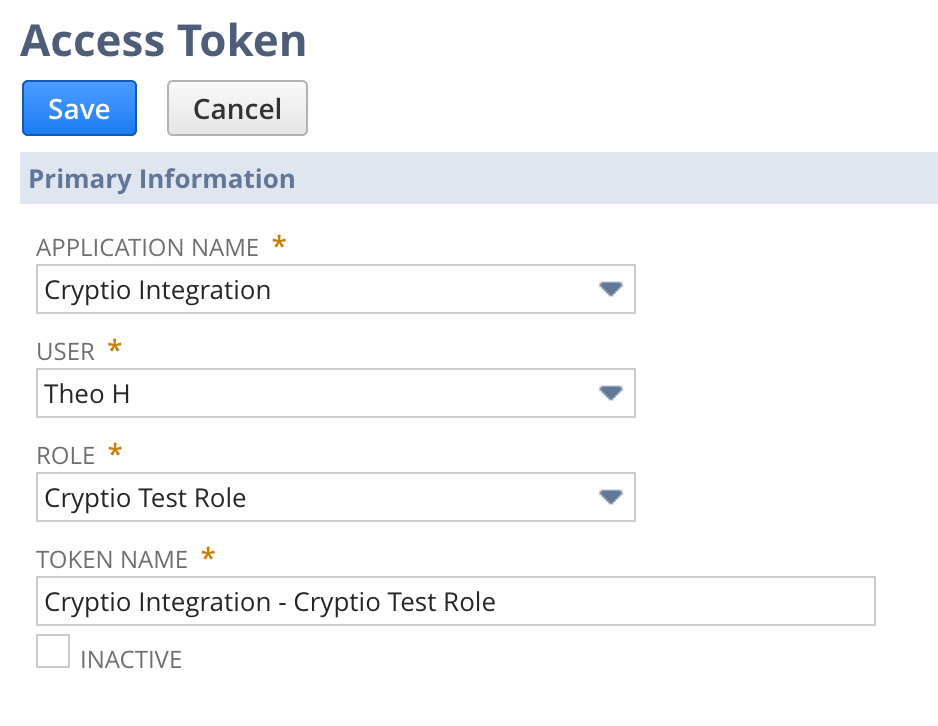
5. Create an Access Token
a. Go to: Setup > Users/Roles > Access Tokens
b. Click New Access Token.
c. Select:
Application Name: the integration you created in Step 4
User: yourself
Role: the new integration role from Step 3Keep the auto-generated Token Name.
d. Keep the auto-generated Token Name.
e. Click Save.
f. Copy and save the Token ID and Token Secret.
These will not be displayed again.
Connect NetSuite to Cryptio
Once your NetSuite setup is complete, finalize the integration in Cryptio:
Go to the Accounting > Integrations page.
Click Connect in the NetSuite box.
Enter:
Account ID: the 7-digit number from your NetSuite URL.
Consumer Key and Consumer Secret (from Step 4).
Token ID and Token Secret (from Step 5).
Subsidiary ID: Enter the subsidiary ID’s for all relevant entities (eg.1,3,4,5,7)
Click Connect.
Your Cryptio account is now linked with NetSuite, and you’re ready to generate automated journal entries.